

Magura
-
Broj sadržaja
565 -
Na DiyAudio.rs od
-
Poslednja poseta
Content Type
Profiles
Forum
Blog
Kalendar
Sve objavljeno od Magura
-
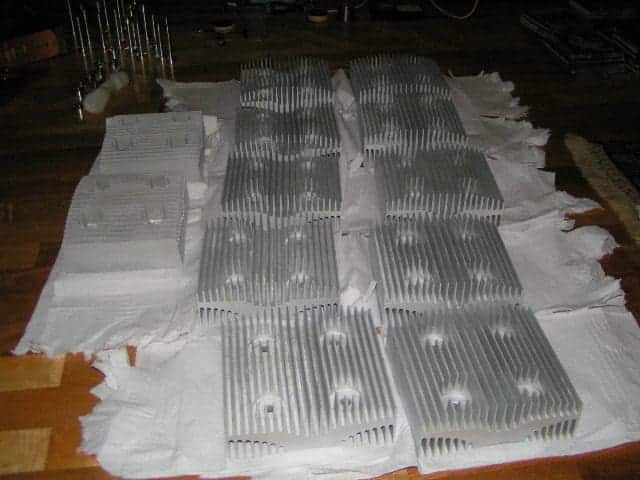
After multiplying the heatsinks, and some anodizing, the heatsinks are ready for assembling.Magura

-
Thanks, that's quite a compliment, when coming from you.Magura:)
-
-But then again, that heatsink fits the bolts Magura
-
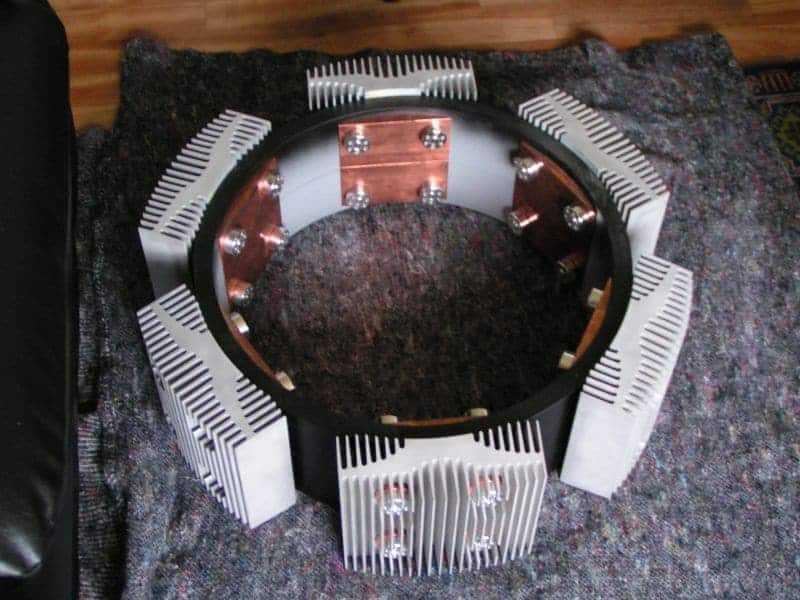
A heatsink that mates with a round box, seamed hard to find off the shelf, so some machining hours were required there as well.Magura
-
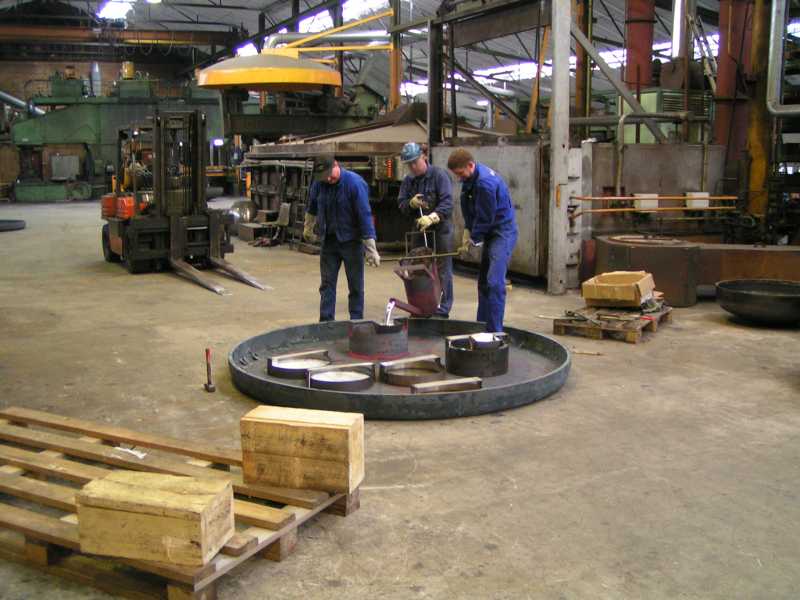
After cooling down the car rims, and some machining later, you get the body of a round box.Magura
-
You have a nice trip, and keep up the translations.Magura
-
Ever wondered what aluminium car rims look like when real hot?Magura
-
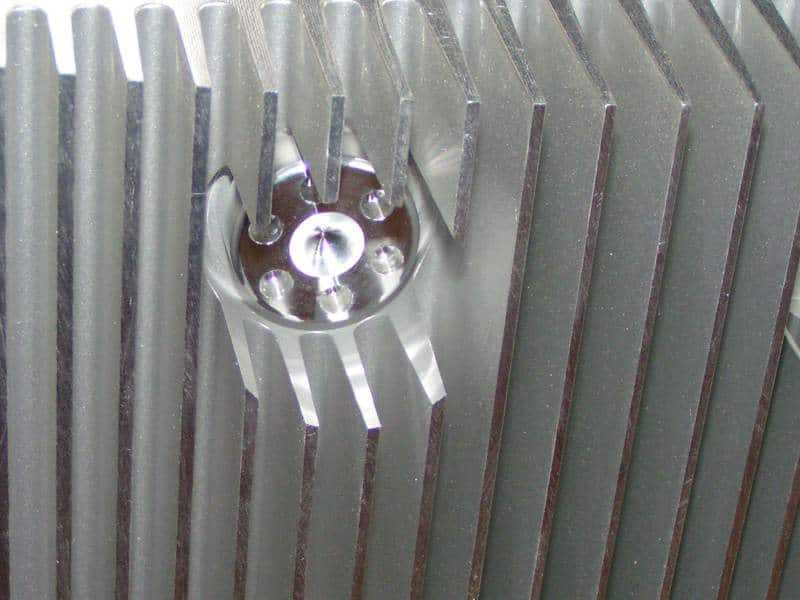
Naah, what you see on the top of the plate, is the holes drilled for the screws. I have been sitting on these, the amps are about as heavy as me, so I figure they're up to the task. Keep in mind that those thingies are only for being able to move the amps while assembling. Once they're finished, they get back on the floor. Magura
-
At this moment, I'm assembling the box. I found it a brilliant idea to do that upstairs, as it then would be out of the way till it's finished.Once I had put together half of one box, that idea seemed somewhat less brilliant, as I could not move it alone So, by the help of a friend, it was carried downstairs and yesterday we made these:Magura
-
Zdravo Aleksandar,Ma koji ti je ku*ac!So, for some time I will continue in English Magura
-
Ahh, then to Juma (Sipi) this is a re-run of yesterdays paper Magura
-
Just out of curiosity, do I know you Sipi?Magura
-
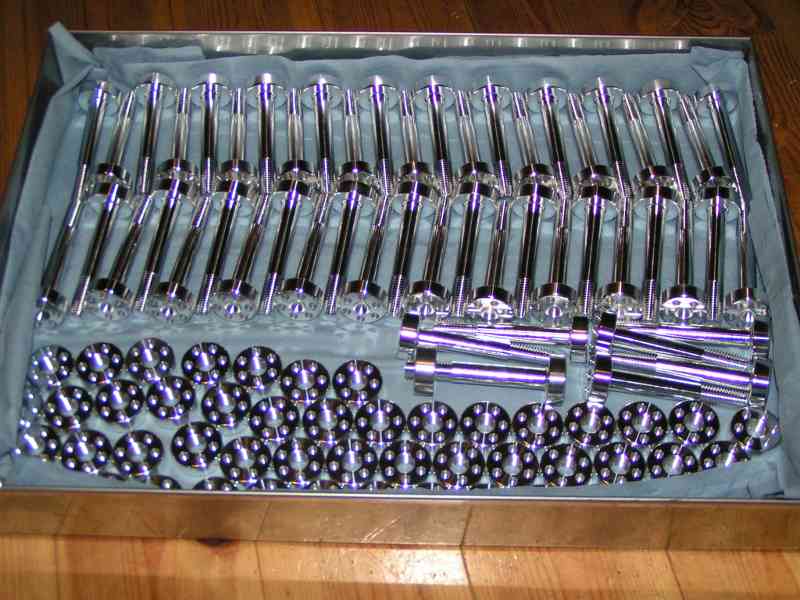
Making 50 is somewhat less fun Magura
-
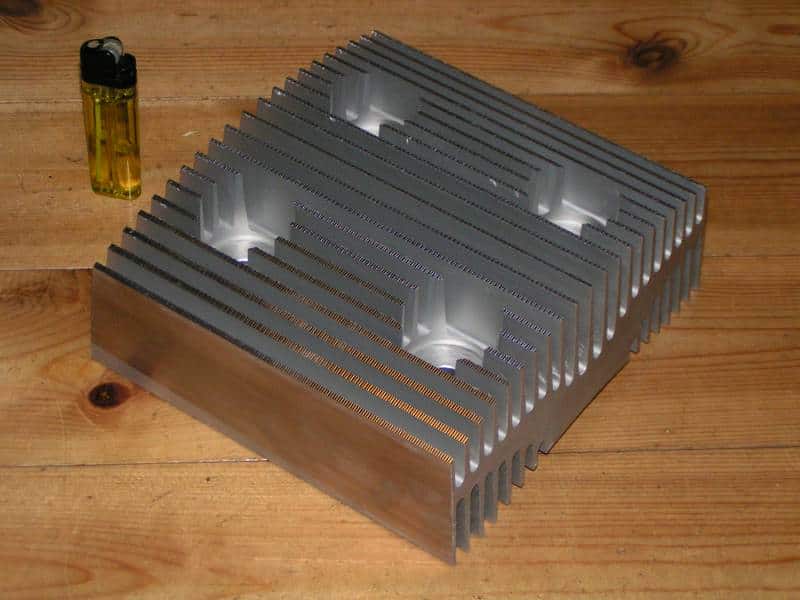
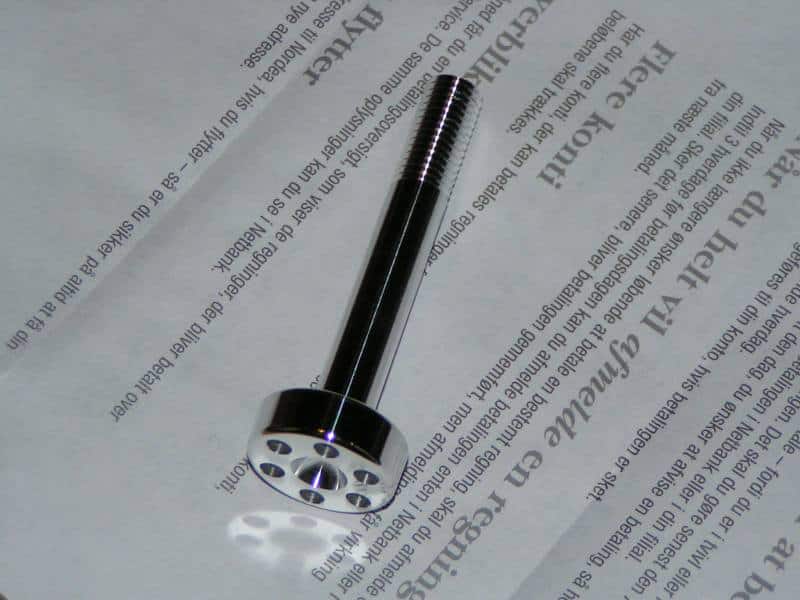
To be able to control the orientation of the heat-sinks, I had to make precision bolts for mounting them. To make it look like I had a bit of integrity, I chose to make the nuts for this as well.Making 1 is ok Magura
-
I'll make a folder, and save the pics then. It's also getting more interesting now, as it's not just a bunch of funny looking parts. Now it's actually possible to tell they have a purpose (sort of).Magura
-
Will do Here is the finished shielded inductor. 5mH, good for 20A.Magura
-
Difference mainly being, that a lathe does not hit the max weight limit Magura
-
If I had the choice, I'd too take unloading a truck, rather than winding those coils, any day Nasty type of work if you ask me.Then you should also know how nice coils are (once made that is), I for one have had some very nice experiences with inductors, and as the copper price has gone down a bit, they're not even all that expensive anymore.As Zen Mod says, I used a lathe for winding them, but to tell you the truth, it didn't make much of a difference to how sore you get -And no, we don't have that much equal rights here, that I get inductors served for a hug and a kiss Magura
-
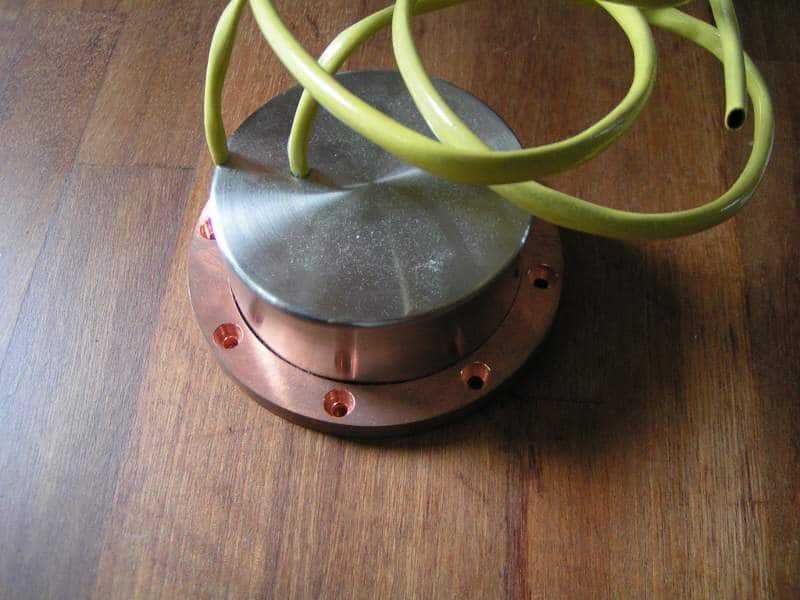
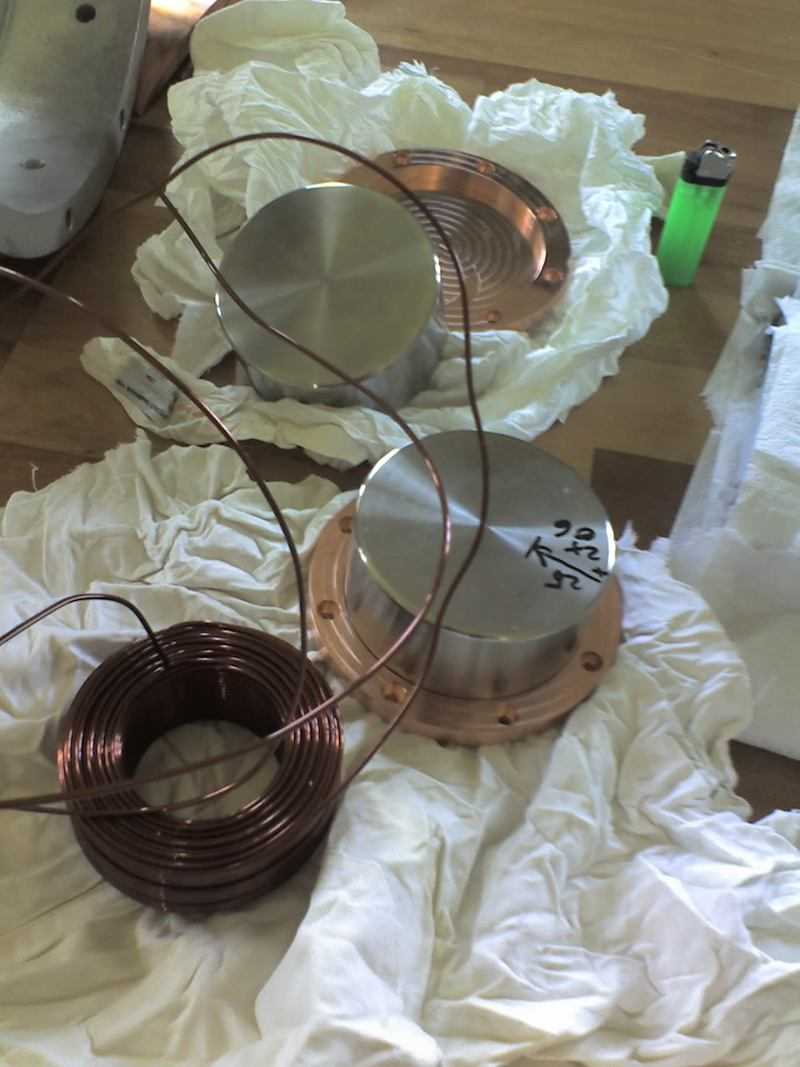
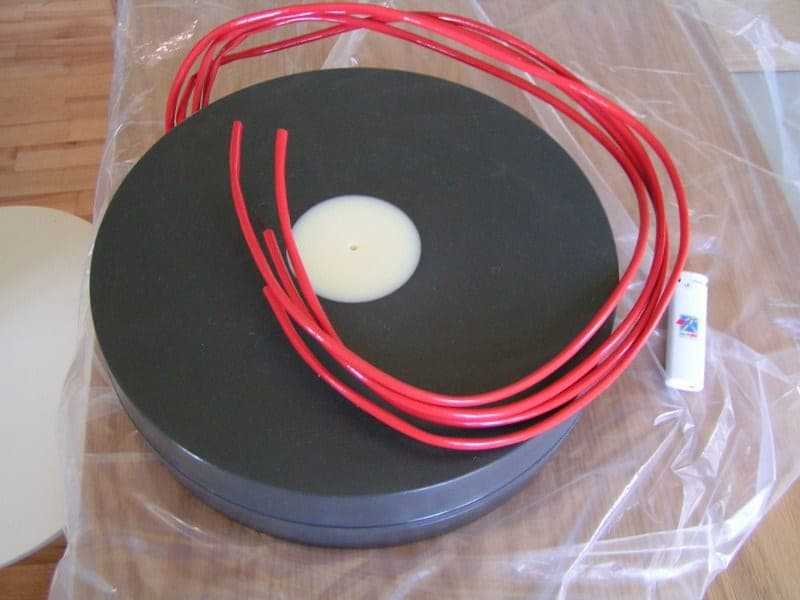
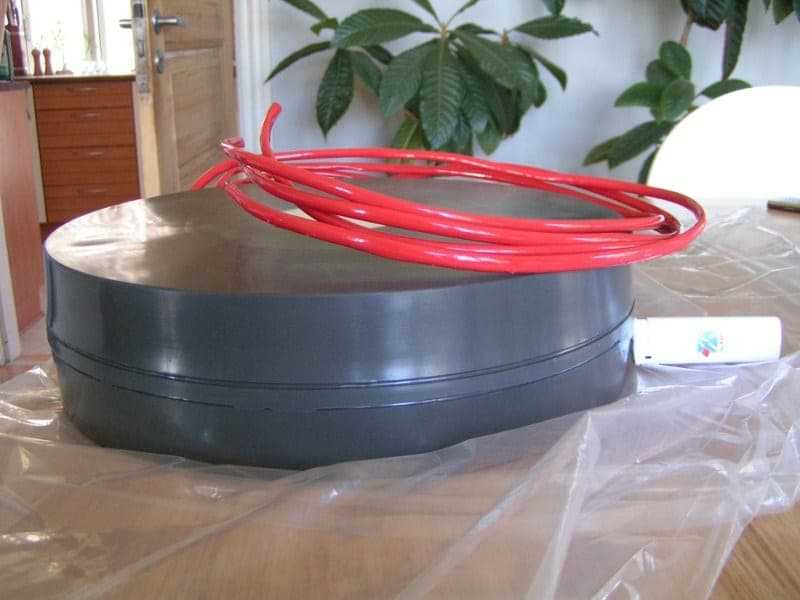
Here you can see one of the more fancy solutions. A shielded inductor, for the CLC filter.To make a shielded air-core inductor is not as simple as it may seem. It requires a balance of ferro-magnetic and non magnetic shielding material, to leave the inductance unchanged, and not get in trouble with saturation. This I got around, by making a "cup" of ferritic stainless steel, and a base that doubles as a heat-sink, of copper.To get the heat transfered to the copper base, I have potted the whole thing.Magura
-
If only I had inherited a copper mine That would have made this a little less daunting to the bank account Actually, I am just an average DIY'er, but have spent a little more time than most are willing to. This construction is really not that much more expensive, than what you frequently see people build. I just have put the money where I thought it is important, and haven't spent them on silver capacitors and fancy wire.Magura
-
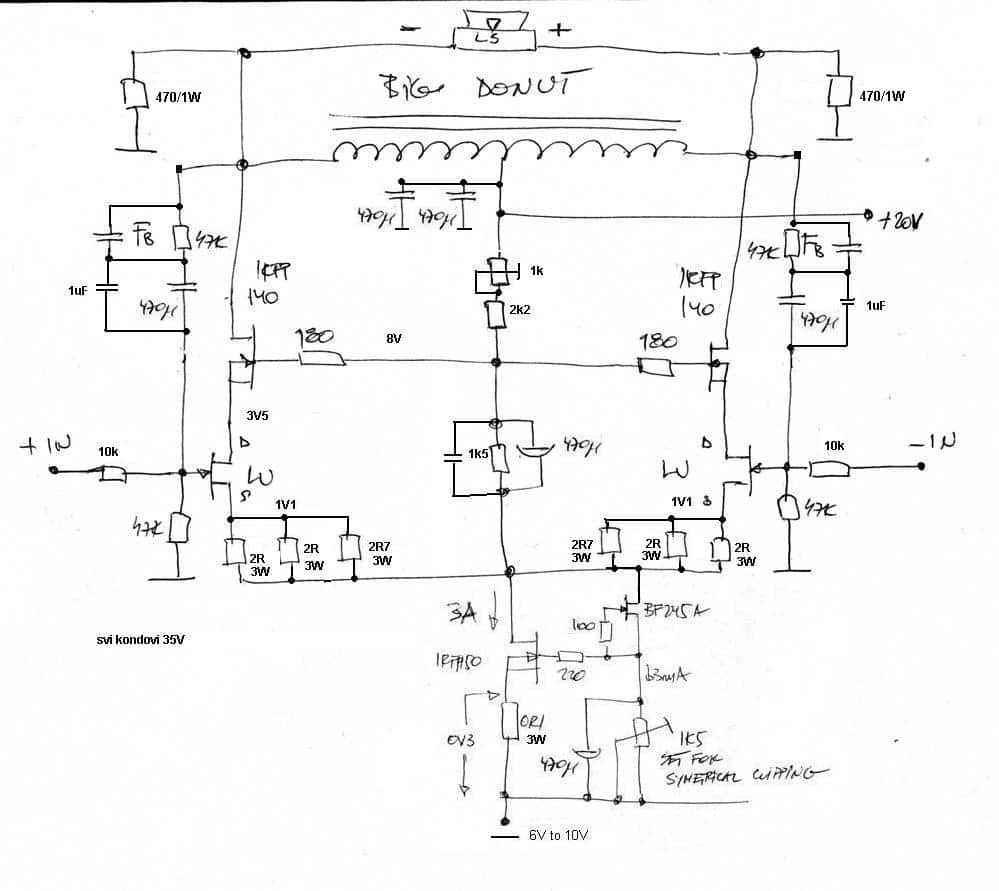
The "big donut" is a 2 x 90mH air core choke. The "big" part of "big donut" , refers to its physical size. Approximately 350mm diameter, and 120mm tall. Some 20kg of copper Magura
-
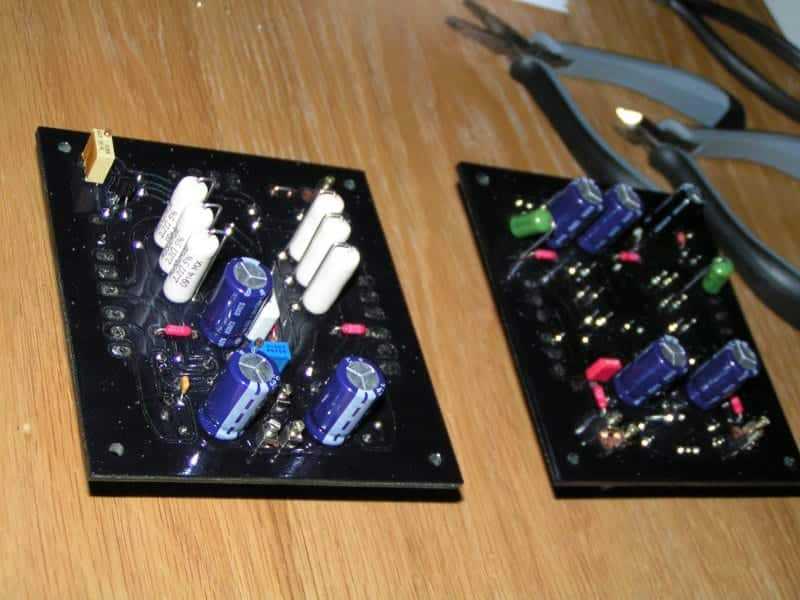
Which has been populated by now.Some of the components will look familiar to the members from behind the ex-iron curtain.Magura
-
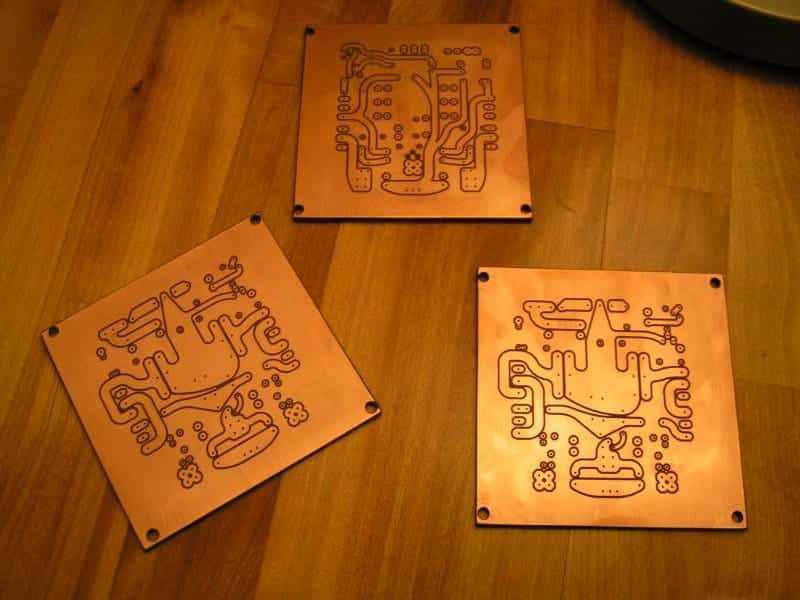
One of the latest steps: A machined PCB. Initial layout by Spavleski, trimmed to snuff by yours truly.Magura
-
So, here is a little something.This project has been ongoing for 8 years by now, and for some strange reason it's about to come to an end.The electronic part is the result of a collaboration between Zen Mod and yours truly.The box is the result of my need to escape the reality from time to time First a schematic:Magura
-
So, a little something to start up this forumMagura